Thank you for wanting to add your business to WeAreTienen.be! There are a few steps to follow to do this, but don't worry: we will guide you through them, step by step!
1: Create an account
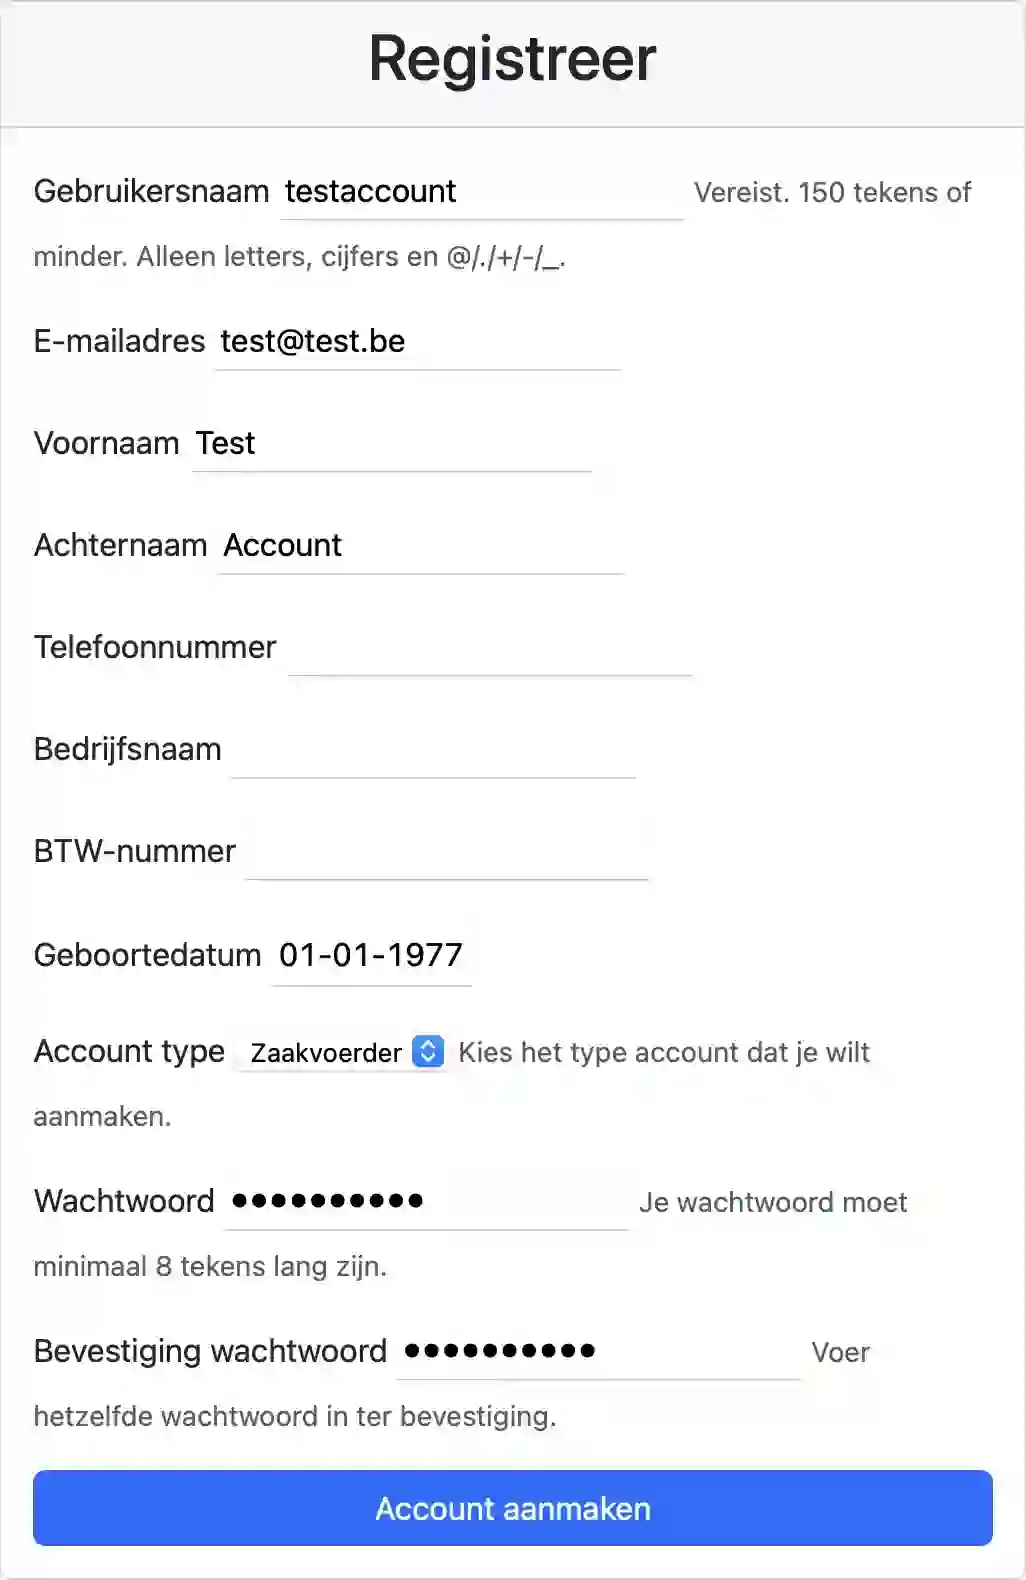
At the top right, in the blue menu bar, you will see “Register”. Click on this to find a form to fill in. Fill in at least the following:
- unique username
- your email address
- under "Account type", select "Business owner"
- Then enter a (secure!) password twice
Click on “Create account”.
You will now see this message: Account created! Check your email to activate your account. After activation, your account must still be approved by an administrator.
2: Confirm your email
Check the mailbox of the email address you provided when creating your account. You will find this email there:
By clicking on the button or following the link, you will return to the login screen where you will see the following message: Email address verified! Your account still needs to be approved by an administrator.
After this, wait until you receive a message from an administrator who will approve your account and welcome you to this platform.
3: Log in with your new “entrepreneur” account
4: Setting up two-factor authentication
To keep business owners' accounts as secure as possible, it is mandatory to set up two-factor authentication. This means you log in with your username and password, but also with a code in an authenticator app on your smartphone. This works with various authenticator apps (e.g. Authy, Google Authenticator, iCloud keychain, etc.) that you can find in the App Store on iOS or the Play Store on Android.
Follow the steps on the screen to set up two-factor authentication.
5: Adding a business
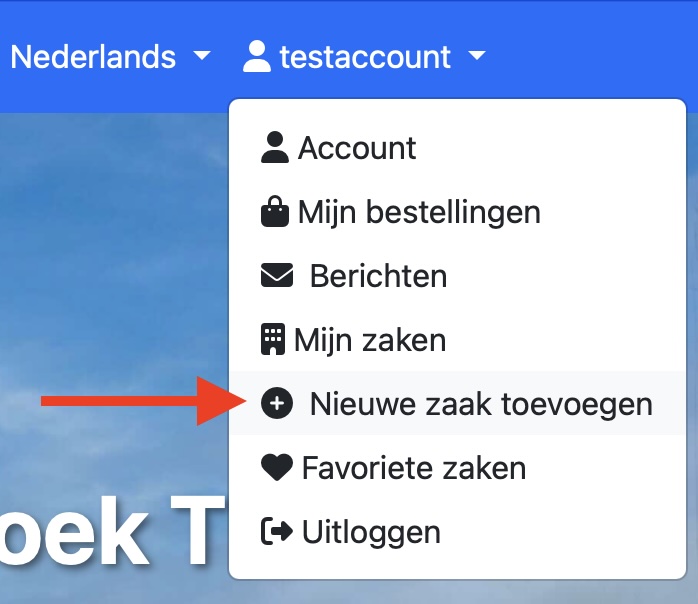
When you are logged in, you will see your username in the blue menu bar of the website. Hovering your mouse pointer over this will bring up a drop-down menu. One of the options here is to add a new business: Add new business. Click on this.
A window will appear where you can type the name of your business. Fill this in and click on “Create Business”.
6: Edit business and add information
After creating your business, you will be taken to the “Edit Business” page. Here you can fill in your business information:
- Business name: you can fill this in in four languages, but for most businesses, English will suffice and you can leave English, French and German blank.
- Contact information: address, telephone number and email address.
- Social media: this allows visitors to find their way to your own website, Facebook, Instagram and TikTok, if you have them.
- Images: you can add one main image. This will be displayed large at the top of your business page and in the business overview. You can also optionally add other images that will be displayed at the bottom of your business page.
- Content blocks: see part 5 of this guide (below).
- Categories: here you can specify the categories under which visitors can find your business. It is possible to select multiple categories, but make sure they are correct. It is not necessary to select parent categories, as these are selected automatically (for example: if you select “Belgian-French cuisine”, “Restaurant” and “Food and drink” will also be selected automatically when you save).
- Locations: here you can add the location of your business: Tienen centre or one of the boroughs.
- Price category: here you can optionally indicate whether your business falls within the price category/luxury category €, €€ or €€€. You can also choose “not specified” if this does not apply to your business.
- Target audience: if your business is particularly interesting for one or more target audiences (families with young children, singles, seniors, groups of friends, etc.), you can indicate this here. It is important to do this as accurately as possible. For example, a restaurant with a play area and a children's menu can indicate that it is suitable for families with young children.
- Interests: here you can indicate whether your business is particularly suitable for visitors with certain interests (culture, wellness and relaxation, adventure, etc.).
- Special needs: here you can indicate any extras your business offers, such as takeaway or eat-in, parking, disabled access, pets welcome, etc.
Once you have filled in everything, click on “Save Changes” to save your page! Otherwise, you will have to start again.
After saving, you will be taken back to your page's Dashboard. More about this in part 8 of this manual.
7: Building a page with blocks
You can fill the main section of your business page using “blocks”. These blocks contain a specific type of content. By combining them, you can make your business page as small or large as you want.
In the “Edit Business” window, you will see “Content Blocks”. Here, you can click on “Add Block” to add a block. The possible blocks are:
- Rich text: a text block in which you can edit text as in Word: bold, italics, underlined, tables, bulleted lists (like this one),... it's all possible. For the vast majority of businesses, this will be the most useful and perhaps even the only important block.
- Hero: a banner that can consist of a background image and optional text on it.
- Accordion: ideal for “frequently asked questions”. Various collapsible text blocks.
- Gallery: an image gallery.
- Carousel/Slider: a series of images in a kind of slide show, with one image following another.
- Map: a map (OpenStreetMap) to indicate a specific location with a pin.
- Video: embed a video on your page, for example from YouTube.
8: Dashboard, SEO and news items
Your business dashboard provides an overview of your business details. There are also two important things you can adjust and do here:
- SEO: this stands for “Search Engine Optimisation”. In other words: information that helps your business page rank high in search results on Google or Bing, for example. These fields are not mandatory, but they do help visitors find your business. Each field has an “i” icon that displays an explanation when you hover over it with your mouse.
- News items: do you have any news about your business? You can add news items at the bottom of the Dashboard. It is best to write these in the four languages (Dutch, English, French, German). Ask the WeAreTienen team for help with this, or even better: have ChatGPT proofread and translate your text. News items are displayed on your page, and visitors who have marked your page as a “favourite” will also receive the news items in their inbox on the website.